这篇纪录一下智能合约开发环境(Remix-ide、Truffle、EthScan)的搭建以及Solidity语言的简单使用,并使用Truffle来创建、编译、部署、测试一个简单的合约demo,并用区块链浏览器查看区块信息来进一步加深理解。参考书籍:《以太坊智能合约开发实战》、《Solidity编程》
环境准备
安装nvm、nodejs、npm
nvm:强烈安利使用,可以便捷的切换node版本。
node:
- 新建国内源的环境变量:
- windows下:
NVM_NODEJS_ORG_MIRROR=https://npm.taobao.org/mirrors/node - linux下:
bashrc或者/etc/profile增加上述内容
- windows下:
- 安装指定版本nodejs,如
nvm install 10.23.1。具体版本号可以用nvm list available查看或者官网https://nodejs.org/en/download/releases查看版本
- 新建国内源的环境变量:
npm:上述安装node后自动就有npm包管理器了,我们换一下国内源即可:
npm config set registry https://registry.npm.taobao.org/。
安装Remix-ide
安装remix-ide的好处是你不用单独去安装solc或者solc.js编译器了,它自带,也不用折腾什么IDEA、vscode、Atom了,这个高亮和补全也还可以,而且自带很多功能。
这里不建议去github下源码编译安装,麻烦比较多,建议直接npm安装即可,并且版本请选择0.10.0或者<0.9.4,本人亲测0.10.1、0.10.2、0.10.3都有问题,需要对源码做改动,并且改完后还不能正常使用。
1 | npm install -g remix-ide@0.10.0 |
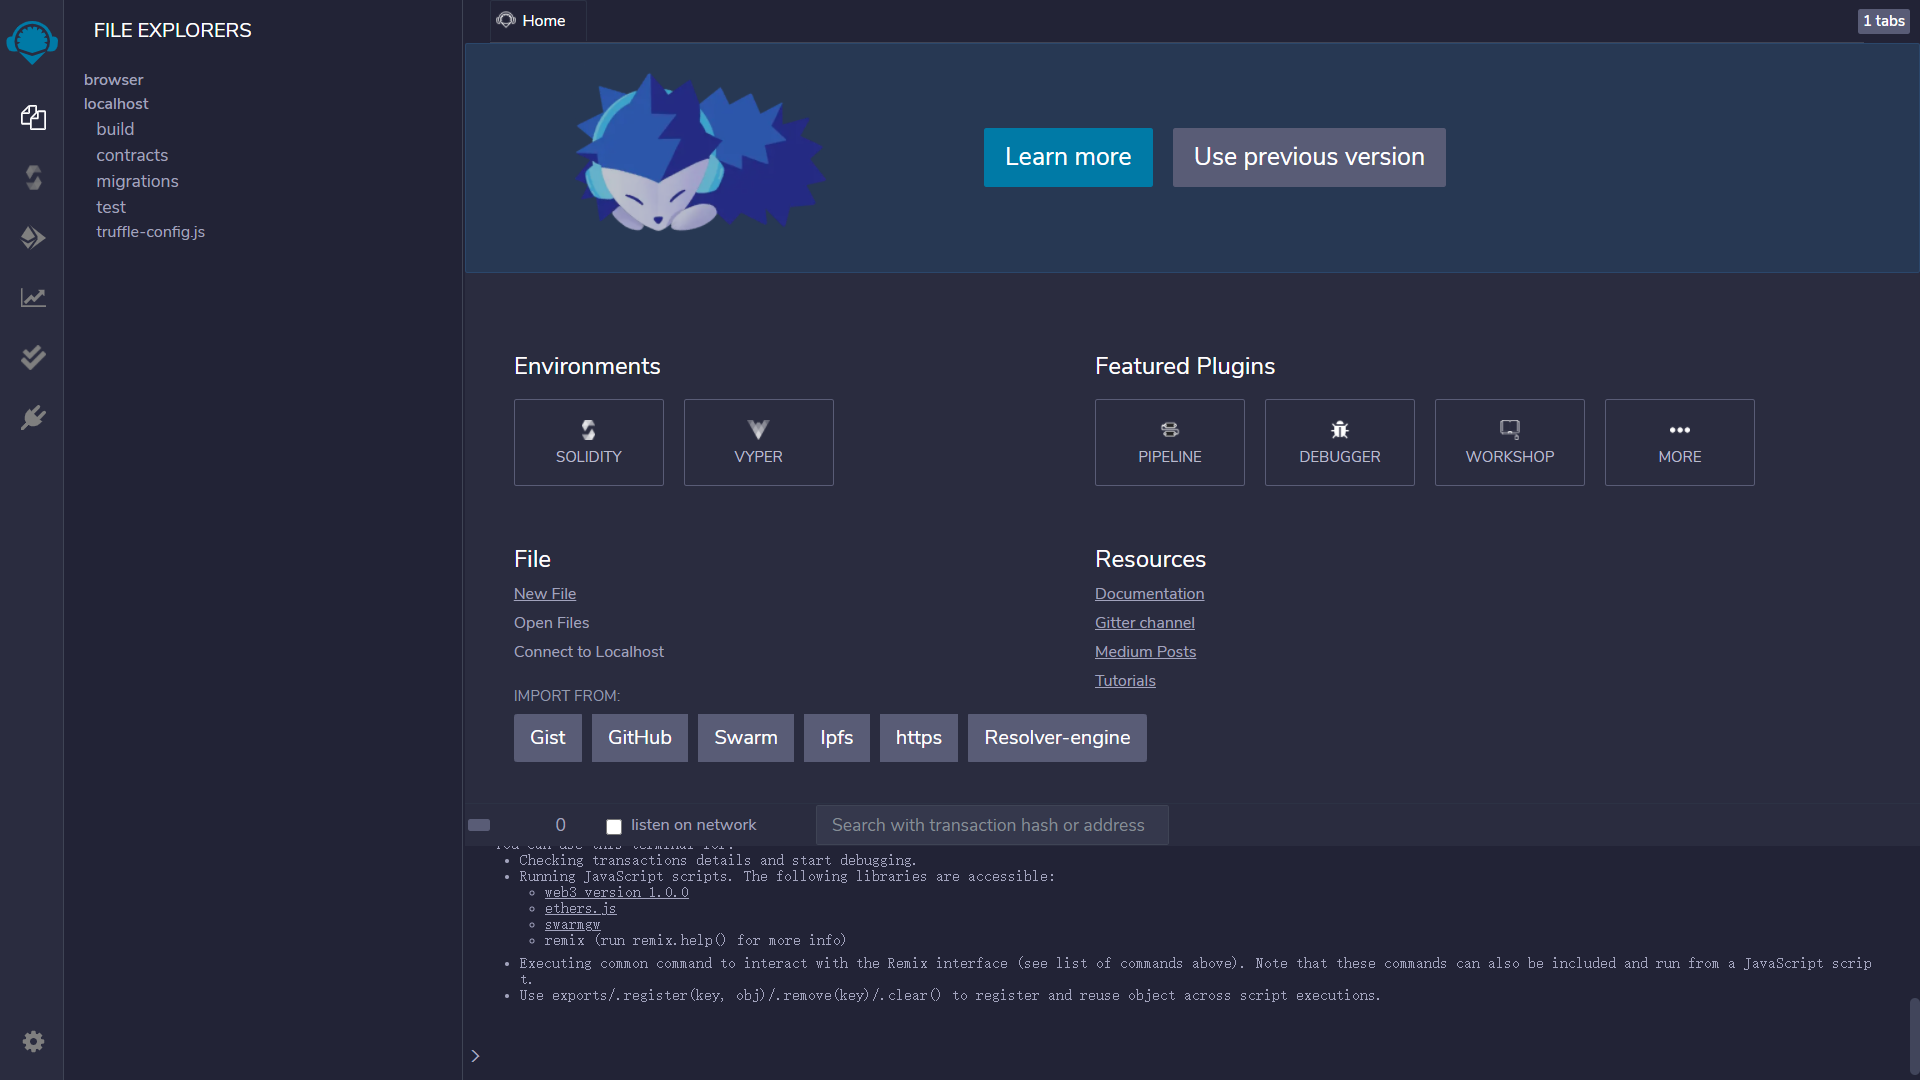
安装好以后直接启动就可以了:

启动了后的结果:
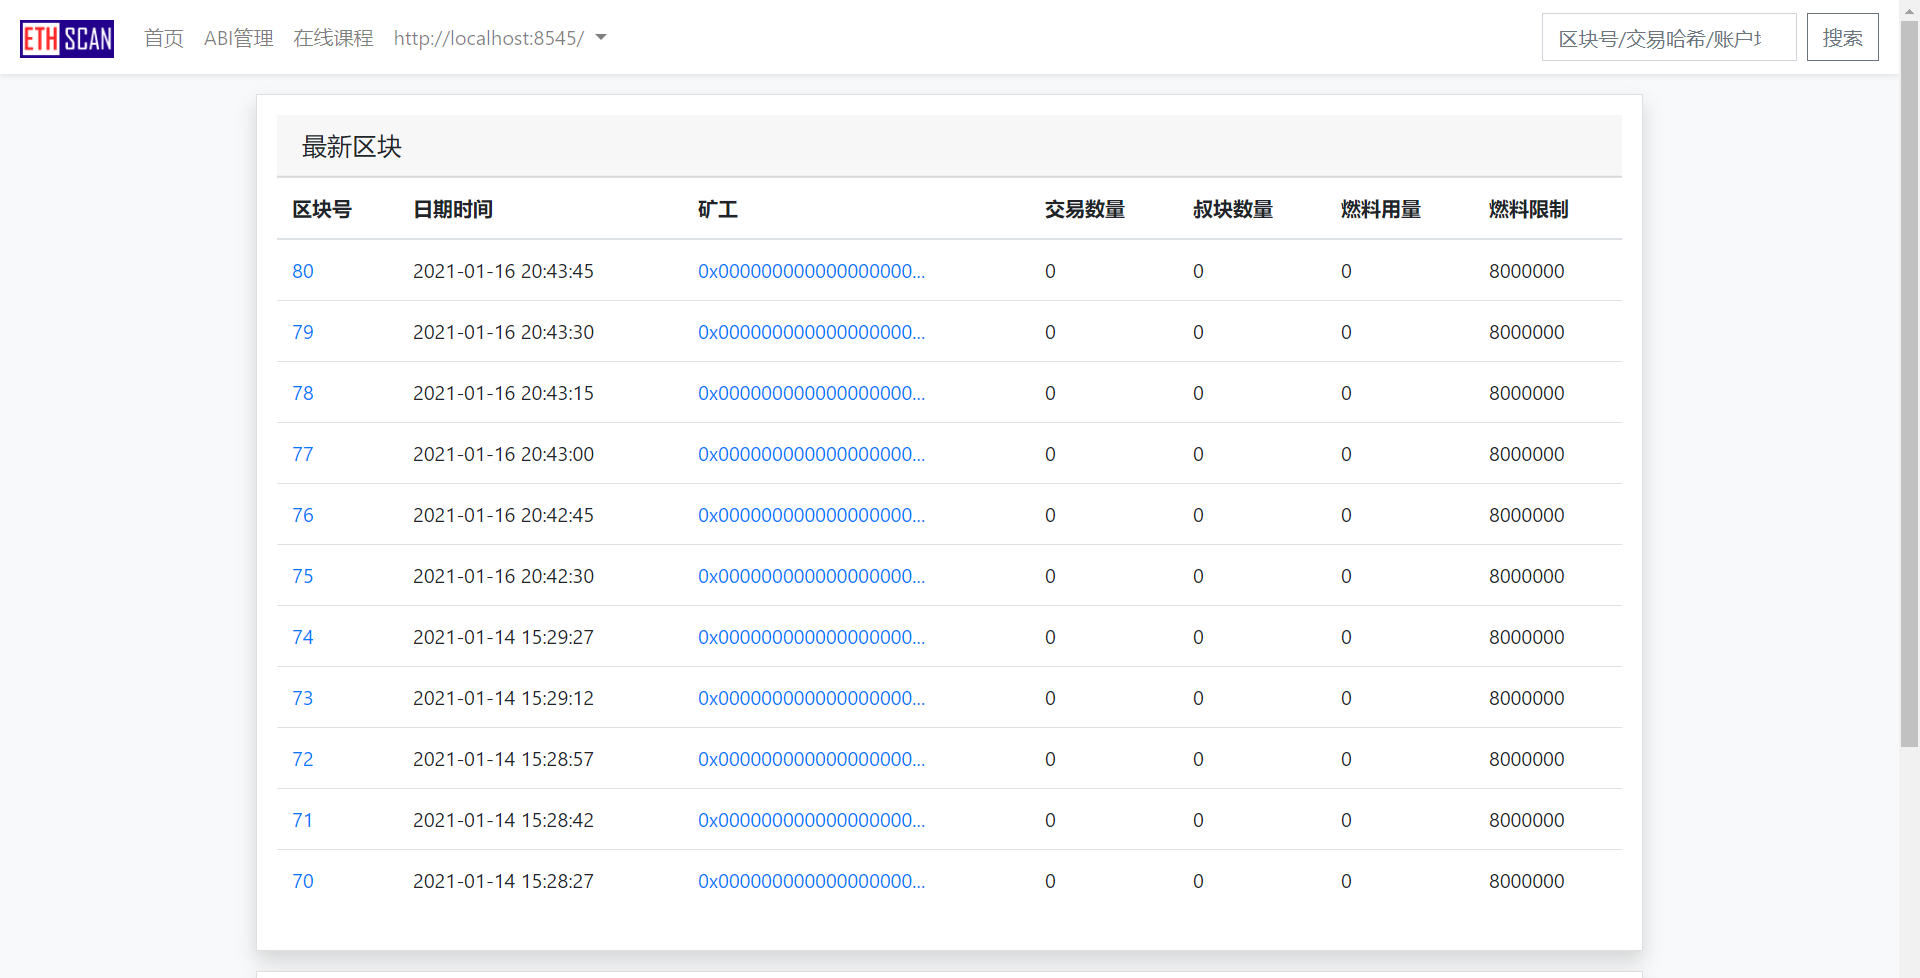
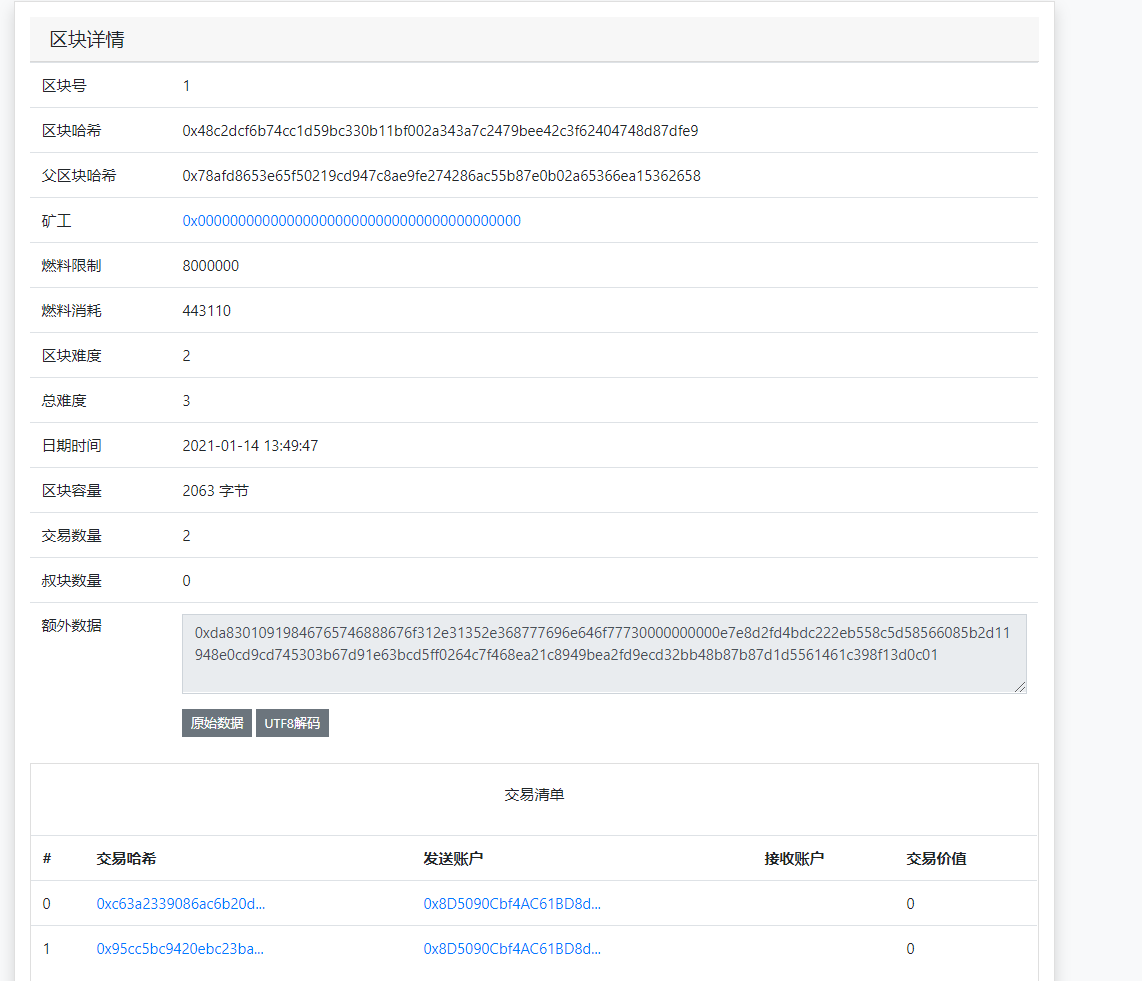
使用EthScan区块链浏览器
区块链浏览器很多,我就随便找了一个EthScan,就是个html网页,很方便,主要是用来查看区块细节信息的,效果如图:
安装使用Truffle
Truffle可以认为是一个帮助你管理智能合约开发过程的工具,可以帮助以初始化、编译、调试、部署一个智能合约,和maven感觉有点像,反正好用的一匹。可以通过这个网址来学习。
1 | npm install -g truffle |
看一下Truffle的常用命令和对应含义:
1 | Truffle v5.1.61 - a development framework for Ethereum |
使用Truffle与Solidity编写一个简单合约
初始化
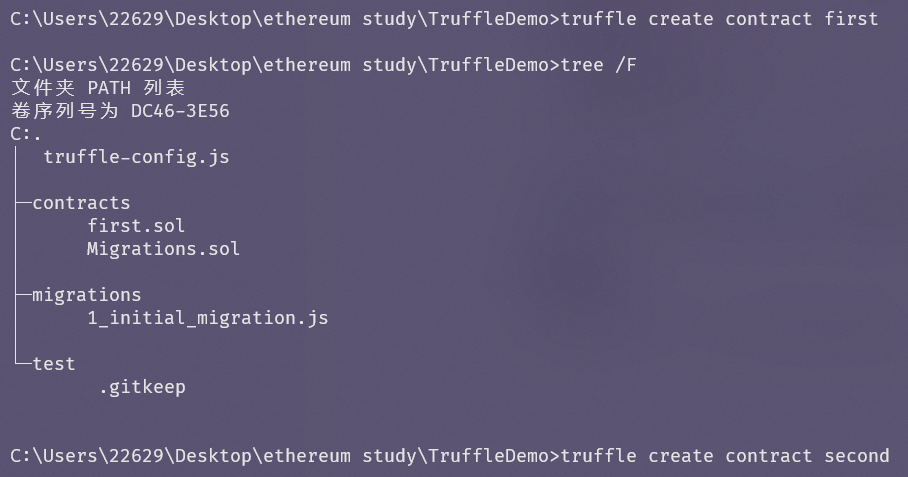
我们新建并进入一个文件夹,运行Truffle init就好了:
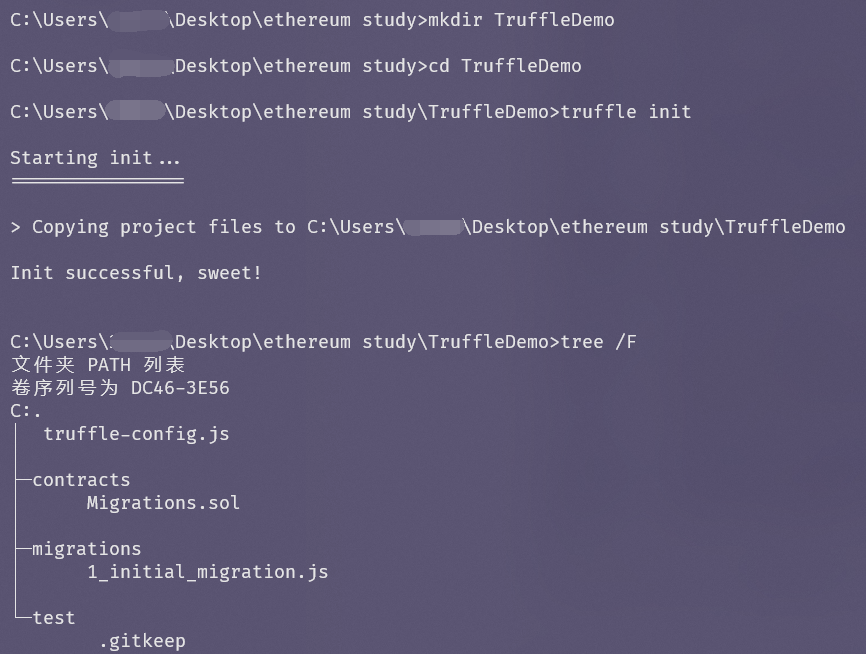
初始化后的文件目录含义如下:
1 | C:. |
我们先配置一下网络信息:
1 | // truffle-config.js 文件里有具体的每一个参数的说明,这里不做说明 |
我们这个网络名叫development,truffle编译的时候会默认使用这个网络的配置,我们也可以通过使用参数--network来指定网络,比如你定义了一个test网络,你就--network test就好了。不带参数就是使用的development。
编写合约
我们创建两个合约first.sol和second.sol:
1 | // SPDX-License-Identifier: MIT |
1 | // SPDX-License-Identifier: MIT |
然后我们创建一个部署文件,定义我们的部署脚本文件:
1 | // 2_custom.js 注意命名方式,是数字_描述.js |
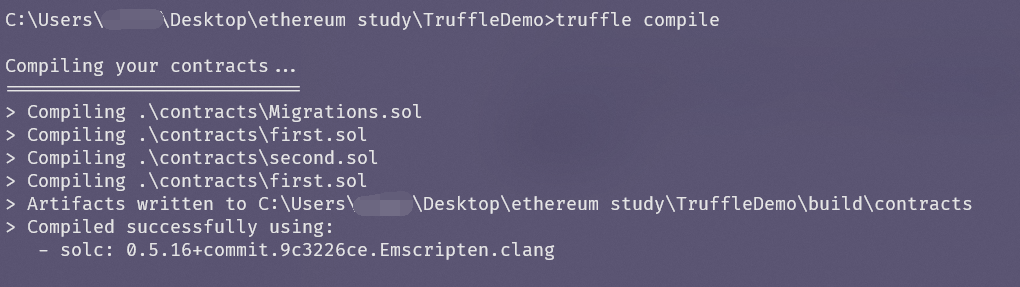
这样truffle在部署合约时就会按照我们指定的顺序来部署合约。下面我们先编译合约。
编译合约
然后我们启动私链,运行deploy命令,注意要开启挖矿模块,并且要解锁用户,不然会报错:"Migrations" -- Returned error: authentication needed: password or unlock.
我们来看一下结果流程,首先编译合约,然后连接网络开始准备部署:
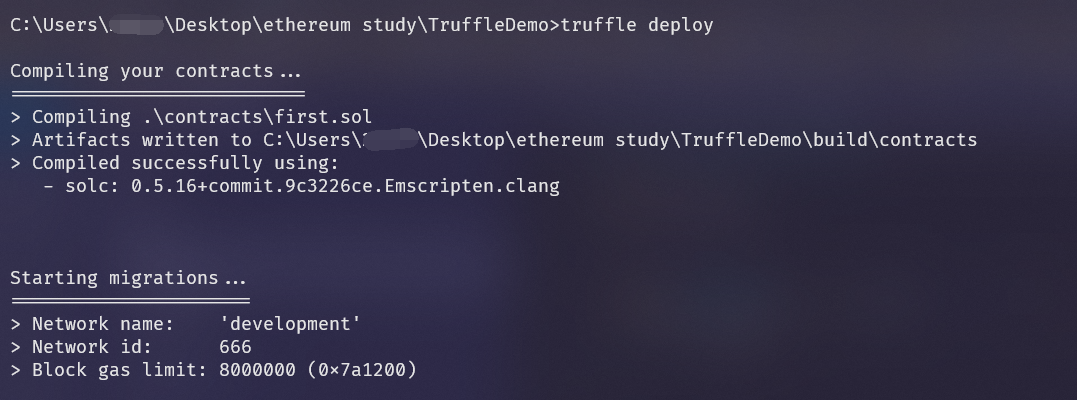
按照顺序(这就是为啥要要求命名规则是数字_描述)执行部署脚本
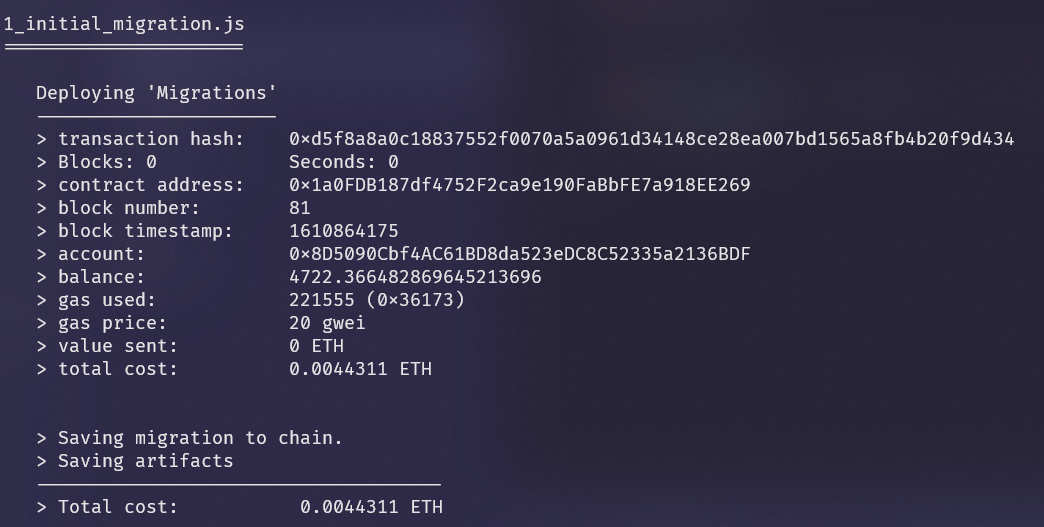
然后执行我们自定义的部署脚本:
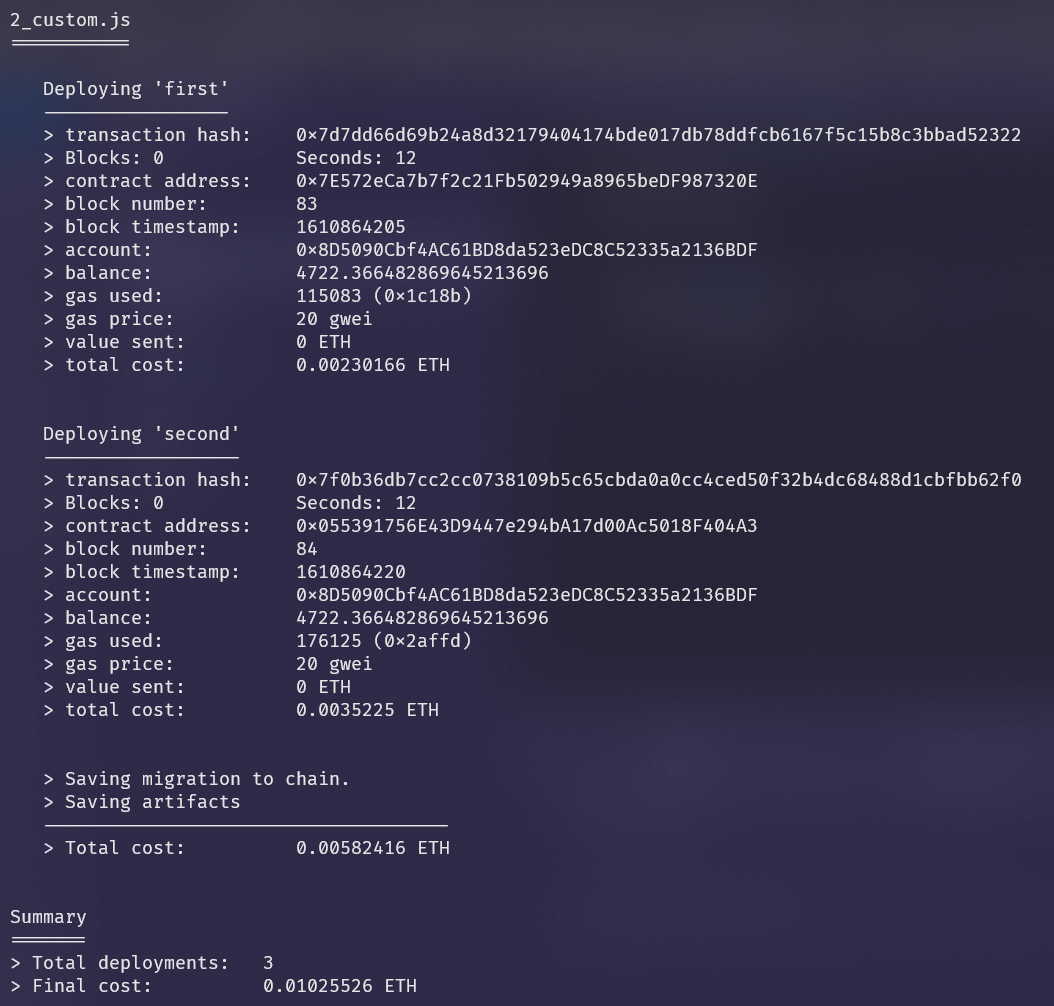
最终部署完成,可以看到共进行了3次部署,花费的以太币也有计算。
同时我们的私链也有以下输出,可以看到hash值与上述哈希值是一样的: 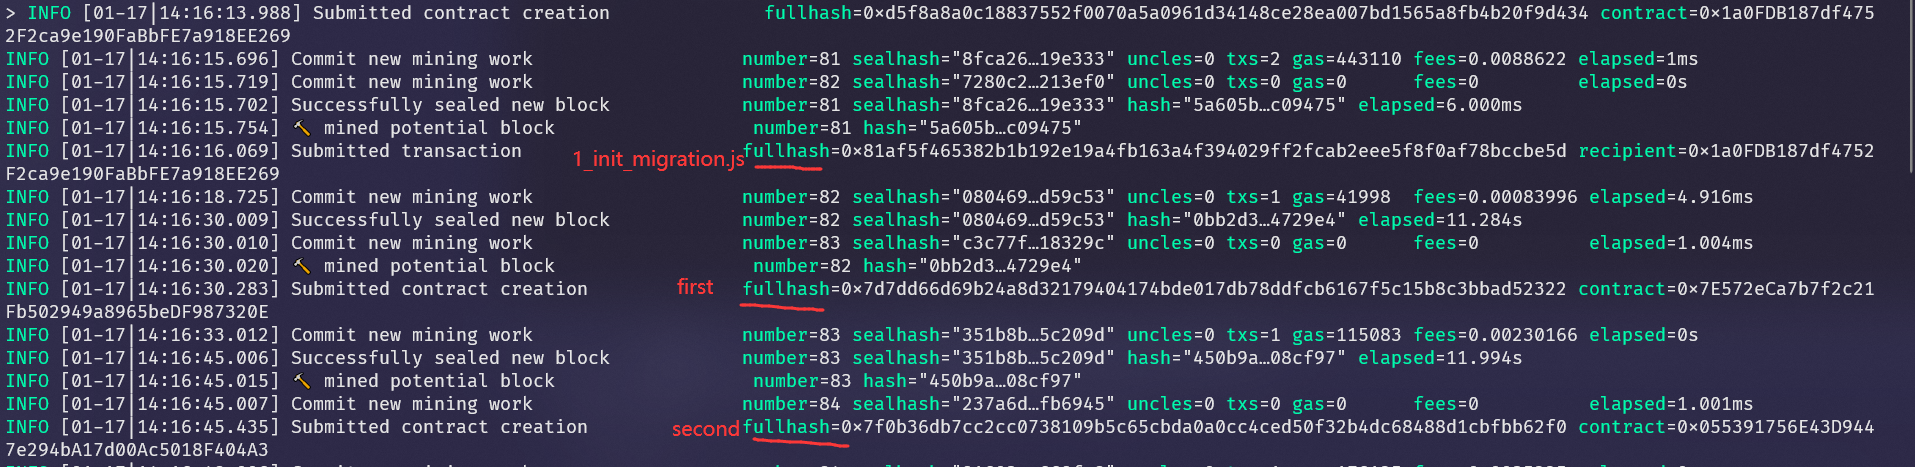
测试合约
测试合约我们需要写一个js脚本,其实和单元测试比较像,主要是看程序的输出符不符合预期。Truffle中测试的脚本文件我们都放到test目录下就行,我们用javascript写一个测试脚本,内容如下:
1 | var testFirst = artifacts.require("../contracts/first.sol"); |
然后我们使用命令truffle test来进行测试,如果指定了测试文件的话就会只运行它包含的测试函数,否则就会运行test文件夹下所有的测试。
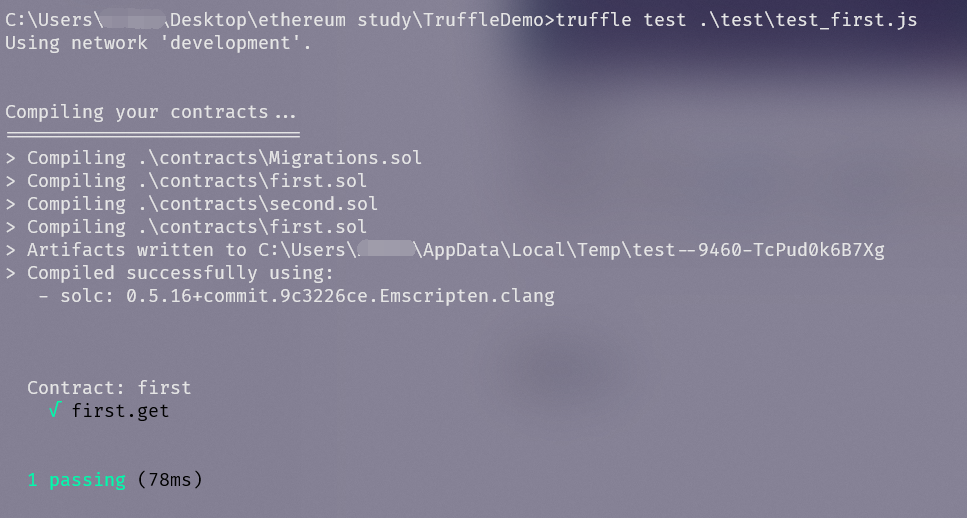
可以看到测试通过,符合预期结果。
当然也可以写solidity文件来进行测试,后续我会补充。
小结与后续
到此为止两篇,以太坊+智能合约的基本概念已经摸清了7,8成了,开发方面的话,网上看到一张图,很好的描述了这些工具之间的关系:
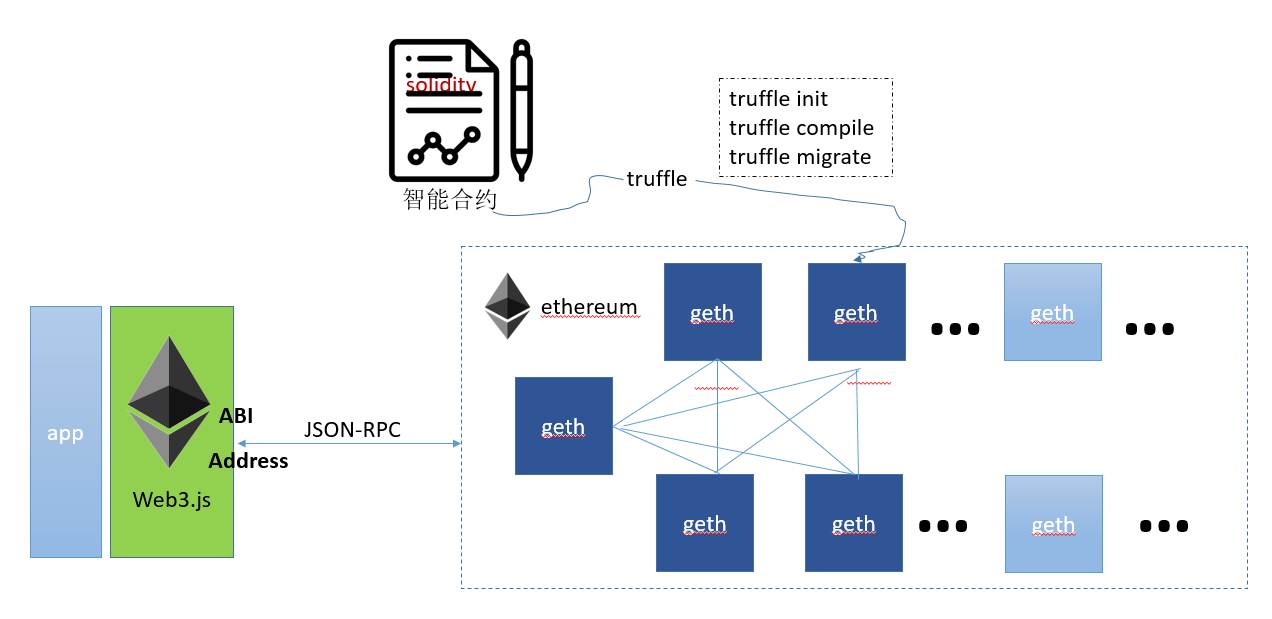
我们使用Truffle来管理我们的项目,这包括初始化、编译、测试、部署,合约最终部署到网络中。然后就可以通过DApp下的web3.js层来调用合约,通过ABI(Application Binary Interface,应用二进制接口)与合约进行交互。
后续接下来可能会学习DApp的相关知识、Web3.js与geth客户端的交互。但是最近可能会补充一些密码学方面的知识,主要是应用于分布式环境下溯源问题的方案,为毕设打基础。
参考学习:
https://blog.csdn.net/GDUYT_gduyt/article/details/88957688
https://blog.csdn.net/gduyt_gduyt/article/details/89058725
https://blog.csdn.net/weixin_33843947/article/details/91635213